
Yosemite isn’t just one of the most beautiful places in the world, it’s also one of the most photographed. Whether you’re shooting on your phone or hauling pro gear, the difference between average content and standout content comes down to timing, perspective, and intention.
This guide breaks it down for novice creators and advanced photographers or videographers, so you can walk away with shots you’re actually proud of.
First Things First: Timing Beats Equipment
Before we talk gear or skill level, this matters for everyone. The best content in Yosemite almost always comes from:
– Early mornings
– Late afternoons
– Shoulder season visits (late winter to early spring)
Soft light, fewer people, and atmospheric conditions like fog, snow, or reflections elevate even simple shots. Midday content is the hardest to make compelling, no matter how good your camera is.
Top 5 Photographic Areas in Yosemite
1. Tunnel View
Best for: First-timers, dramatic hero shots, sunrise and sunset
If you want the classic Yosemite moment, this is it. Tunnel View gives you El Capitan, Bridalveil Fall, and Half Dome in one frame.
Tips: Shoot wide and include the guardrail or trees to frame the shot naturally. Arrive before sunrise or right after a storm when clouds break for layered light and depth.
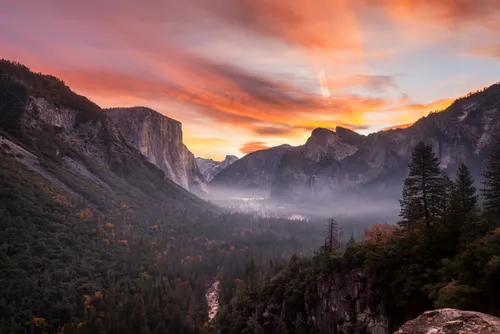
Photo: Bay Photography
2. Yosemite Valley (Merced River Area)
Best for: Reflections, storytelling, reels and carousels
The Merced River is one of the most versatile photo areas in the park. It’s ideal for capturing reflections, movement, and people-in-nature moments.
Tips: Shoot low to the water and let reflections do the work. Use a longer lens to compress reflections or shoot sequences for cinematic reels.
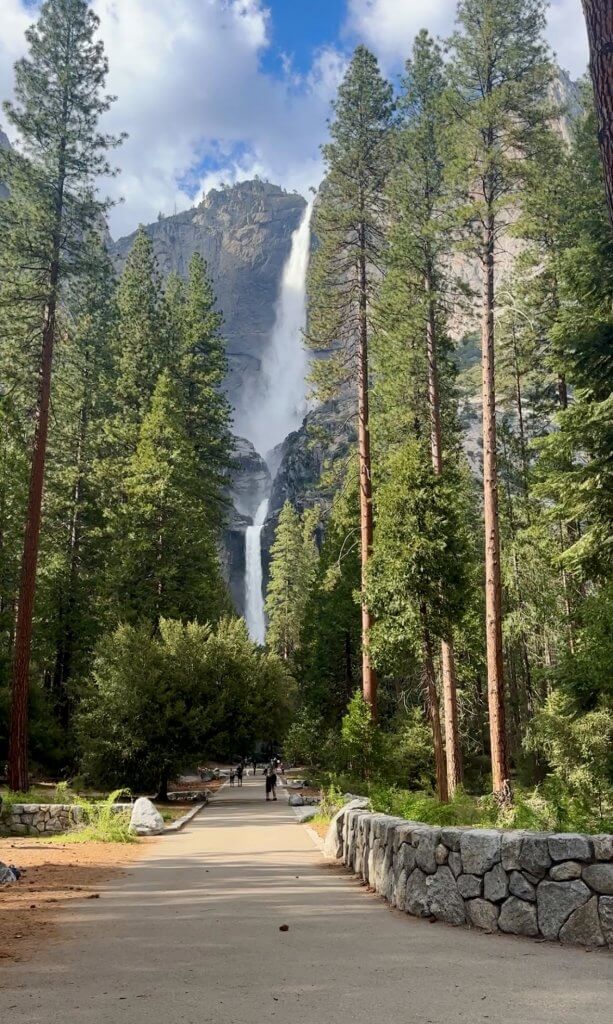
3. Lower Yosemite Fall
Best for: Waterfall shots without a long hike
This is one of the most accessible waterfalls in Yosemite and still incredibly photogenic, especially in winter and early spring.
Tips: Include people or trees for scale instead of trying to isolate the waterfall.
4. El Capitan Meadow
Best for: Minimalist compositions, scale, moody light
This area is all about scale and simplicity. El Capitan rising above open meadows creates powerful, clean compositions.
Tips: Shoot during changing weather when fog moves through the meadow for layered depth.
5. Valley View
Best for: Sunset, reflections, low-effort cinematic shots
Often overlooked, Valley View is one of the most reliable content spots in the park.
Tip: Stay through sunset and into blue hour for richer tones and calmer water.
Yosemite Content Tips for Beginner Creators
If you’re shooting with a phone or just starting out, focus less on “iconic shots” and more on storytelling.
- Work with leading lines
Roads, rivers, bridges, and boardwalks naturally guide the eye. Stand back and let the landscape do the work. - Use people for scale
A single person in frame helps convey how massive Yosemite really is. This works especially well near rivers, viewpoints, or valley meadows. - Shoot vertically and horizontally
Vertical works best for social platforms, but horizontal shots give you flexibility for blogs, carousels, and future reuse. - Don’t chase perfection
Some of the most engaging Yosemite content is imperfect. A little snow on boots, fog rolling in, or kids exploring often performs better than polished landscapes.
Beginner creators should aim to capture
– Movement (walking, flowing water, falling snow)
– Details (hands on a railing, boots in snow, steam from coffee)
– A sense of arrival and experience
This makes your content relatable, not just pretty.
Yosemite Content Tips for Advanced Creators
If you’re shooting with a DSLR, mirrorless, or drone (where permitted), Yosemite offers endless creative depth.
- Scout before you shoot
Arrive at locations earlier than you think you need to. Watch how light hits cliffs and water before committing to your setup. - Embrace weather
Clear skies are easy. Fog, snow, and storms are what make Yosemite content memorable. Advanced creators should plan around weather, not avoid it. - Vary your focal lengths
Wide shots establish scale, but compression shots of cliffs, trees, and waterfalls often feel more cinematic and unexpected. - Think in sequences
Instead of one hero shot, capture a series: wide, medium, detail. This is especially powerful for reels, blogs, and storytelling posts.
Advanced creators often get their strongest content by slowing down and committing to fewer locations rather than rushing through the park.
Off Season Is a Content Sweet Spot
Late winter and early spring are ideal for creators at any level.
You’ll get
– Fewer people in frame
– Softer, more dramatic light
– Snow-dusted landscapes without peak-season chaos
– Easier access to roadside viewpoints and valley locations
This season rewards patience and observation, which is exactly what good content needs.
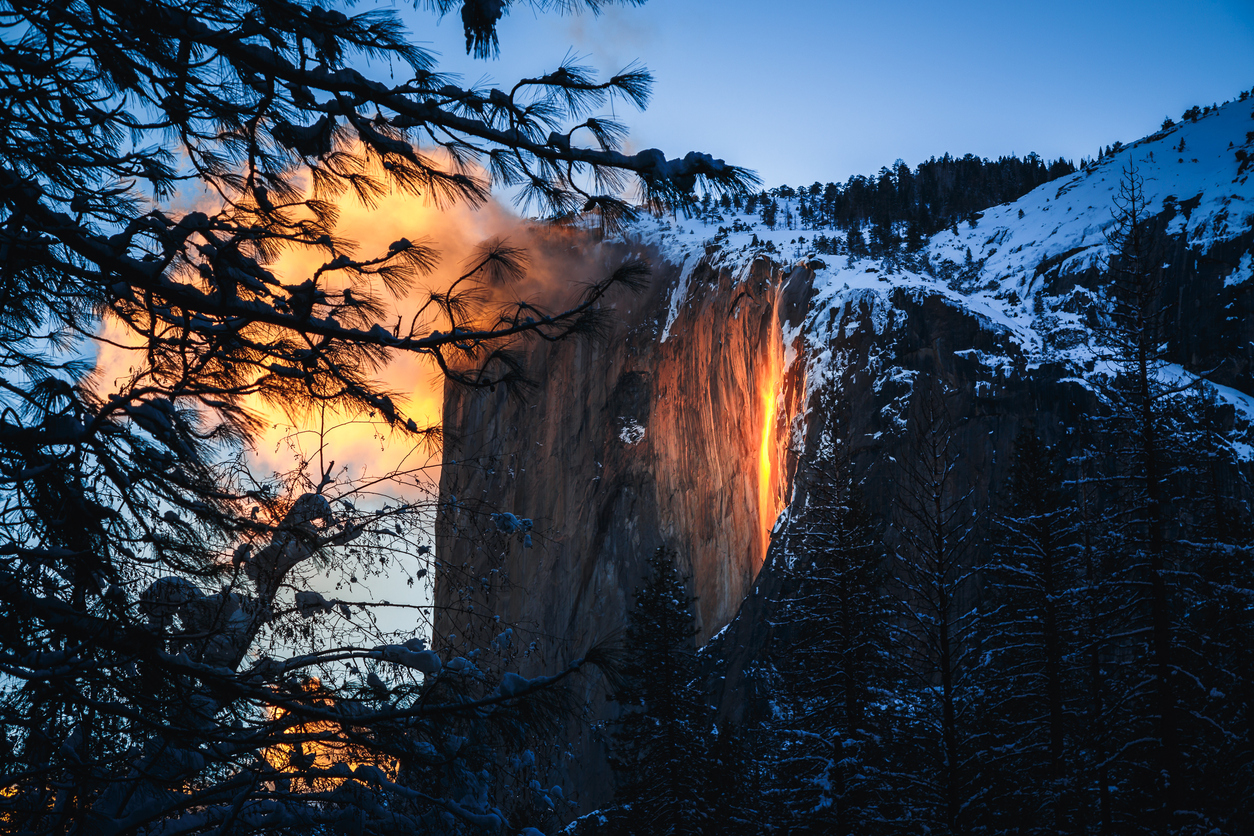
Yosemite Firefall at Sunset, Yosemite National Park, CA
Final Takeaway
Getting the best content in Yosemite isn’t about having the best camera. It’s about understanding light, timing, and how you want your audience to feel. Beginners should focus on storytelling and simplicity. Advanced creators should lean into mood, weather, and intentional composition. Yosemite will meet you at whatever level you’re at, as long as you slow down enough to see it. Don’t forget to tag us in your creations!
Follow Yosemite View Lodge on Instagram